Do It Yourself – THE CLIFF NEWS
3-4 minutes
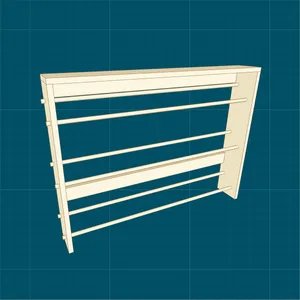
DIY Shoe Rack Project
Create a practical and stylish shoe rack for your home with this easy-to-follow guide. In this project, you will learn how to build a wall-mounted shoe rack with a sturdy design that works well for keeping shoes organized and off the floor. Here’s how to make it!
Materials You’ll Need:
- Wooden Boards: Four pieces, each measuring 3/4” x 5-1/2” x 48” (choose any wood species)
- Dowels: Six pieces, 5/8″ diameter, 48″ long hardwood round dowels
- Fasteners: 1-1/2″ brad nails, 1-1/2″ pocket hole screws
- Tools:
- Drill press and 5/8-inch Forstner bit
- Jigsaw
- Miter or circular saw
- Drill/driver
- Pocket hole jig
- Speed Square
Step-by-Step Guide:
1. Prepare the Side Pieces
Begin by cutting two side pieces to the desired length (28 inches). Using a Speed Square, draw three angled lines: the first line should be 1-1/2 inches from the top, and the other two should be spaced 9-3/4 inches apart. Mark the angles at 1-1/2 inches and 4-1/4 inches from the front edge.
2. Notch the Sides for the Baseboard
To ensure the rack sits flush with the wall, you’ll need to notch out a section of each side piece to fit around the baseboard. Measure the height and thickness of your baseboard, then use a jigsaw to cut the notches accordingly. A sharp jigsaw blade helps prevent rough edges.
3. Drill Holes for the Dowels
On each side piece, mark the location for dowel holes. Use a drill press with a 5/8-inch Forstner bit to drill clean, precise holes at each mark. For best results, place a scrap piece of wood beneath the material to avoid tear-out during drilling.
4. Attach the Top Piece
Cut a top board to a length of 37-1/2 inches, then position it on top of the side pieces. Secure it in place using brad nails, ensuring the sides are mirrored and the drilled holes align properly.
5. Install the Cross Members
Cut two cross members (36 inches each) to fit between the side pieces. Drill pocket holes on both ends of the cross members, then attach them to the side pieces using pocket hole screws. Position one cross member against the top and the other 8 inches from the bottom to provide added support.
6. Insert the Dowels
Cut six dowels to a length about 1 inch longer than the width of the rack. Slide the dowels into the drilled holes, leaving approximately 1/2 inch of each dowel protruding from both sides. If the dowels do not spin freely, secure them by driving brad nails through the sides into the dowels.
7. Mount the Shoe Rack
Finish your shoe rack by painting, staining, or applying a coat of polyurethane to protect the wood. Once the finish has dried, locate the wall studs where you plan to mount the rack. Position the rack and drive screws through the cross members into the studs for a secure installation.
Final Touches
Now your custom wall-mounted shoe rack is ready to keep your footwear organized in style. Whether you opt for a simple wood finish or add a bit of paint, this rack is both functional and a great addition to your space.
By following this guide, you’ll have a sturdy, custom-built shoe rack that enhances both your home’s organization and aesthetic. Happy building!